
Today in this article, I am going to explain the IT Support ticketing system using Infowise Ultimate forms. We will see how a manager can assign issues to another support team member with proper notifications. Here we will not use any code or workflow, fully no code solution using Infowise Ultimate forms.
I will explain, how to Add Permissions to Columns and How to Request an Issue using Infowise Ultimate Forms. In this example, the employee sends an issue request to the manager. Manager assigned issue to the support team member and support team member will resolve it and update the status of the issue.
If you are new to Infowise Ultimate Forms, check out below useful posts:
- InfoPath alternatives for designing SharePoint Forms
- Team Leave Request Management Solution with Infowise Ultimate Forms
- Infowise Actions Vs SharePoint Workflow: Automate Site Creation process Infowise Ultimate Forms Create a Site Action in SharePoint
- Infowise Actions vs SharePoint workflows
- Easily Configure Email Notifications using Infowise Ultimate Forms action
Create Support List in SharePoint Online Site
Here I have Created a list “ITSupportTickets” with different columns in my SharePoint Online site. Columns are:
- Title
- Description
- Priority
- Manager
- Issue Assigned UserName
- Issue Status
The list looks like below: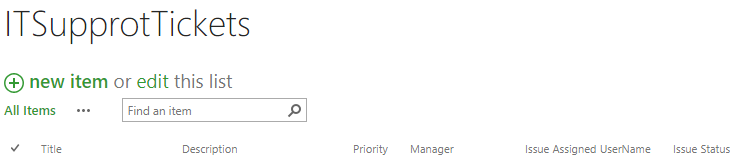
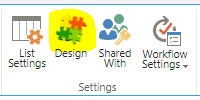
Design Form using Infowise Ultimate Forms
Now we can design our form using Infowise. Next, we are going to create Design form Layout for the list using Infowise Ultimate forms Design. Go to list tab->click on Design in setting section as shown below
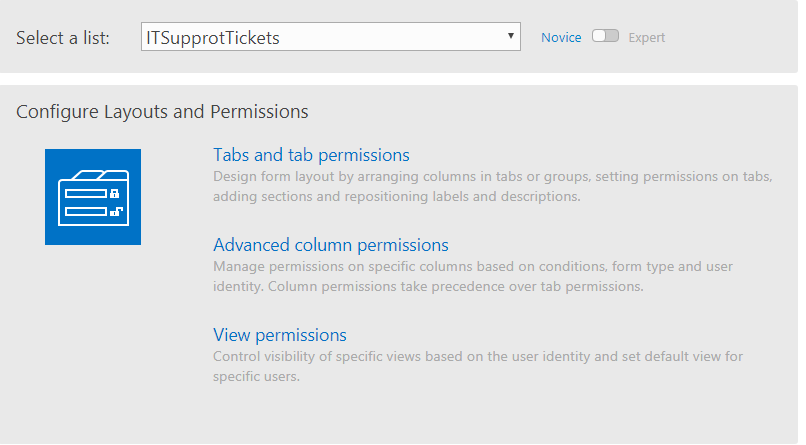
Configure Layout and Permissions
In Infowise Ultimate Forms designer, Click on ” Tab and Tabs Permissions” which is under “Configure Layouts and Permissions”
Infowise Ultimate forms
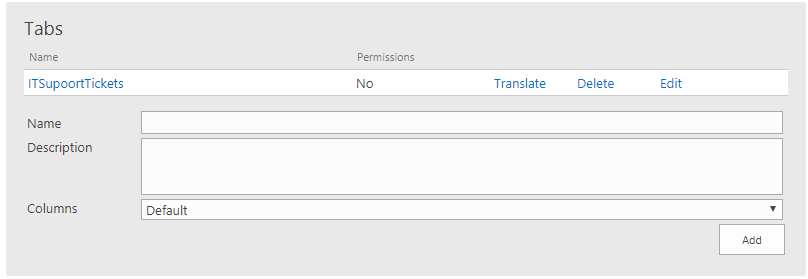
In Tabs Section, enter the Name, and Description clicks on the add button then it will add in the tabs section as shown below.
Infowise Ultimate forms permissions
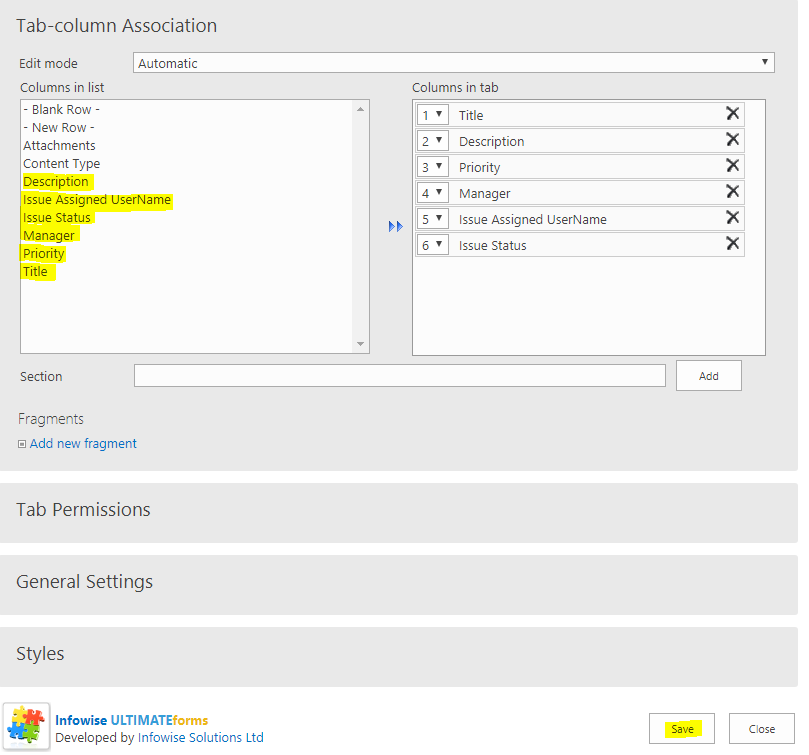
Next coming to “Tab-column Association” section, select columns from the left side “Columns in list ” block and click arrow button it will be added in “columns in tab” section, and next click on Save button as shown below.
Show/Hide Columns Based on User Permission
Next, go to the “Advanced column permissions”, Now add permissions on column based on your requirement.
Follow the below screenshot how to add permissions on columns. here I have selected Issue Status column and given permission level Read-only. Next, go to ” For users/groups”, add username here and click on save button.

Same way, I have added permission level is Deny(hidden) to one more column(Issue assigned UserName). because the column is not needed for the employee.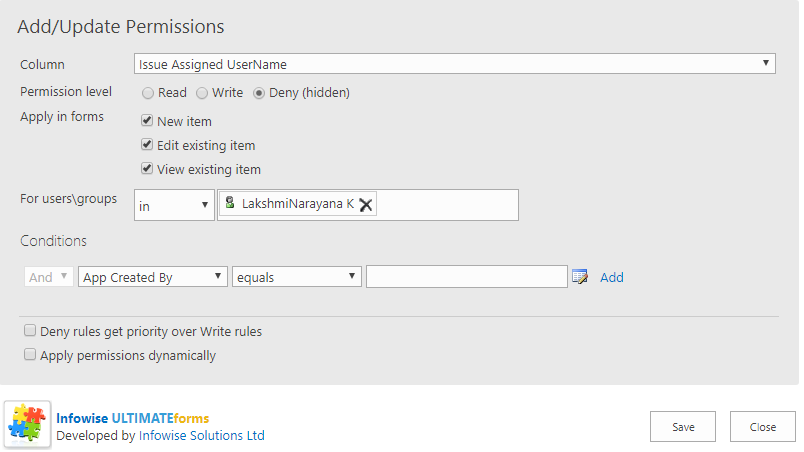
Infowise ultimate forms permissions
But “Issue assigned UserName” column is needed for the manager to assign the issue to the user1. for the manager, I have given write permissions so it will appear to the manager otherwise it won’t appear. I have added some permissions to columns for based on the requirement as shown below.
For example, look at “Issue status” is in “Read” mode for the Lakshminarayana k, for the other two users it will be set in “Write” mode. because the manager and user1 needed this column. if we will not set in “write” mode it won’t appear to them

Now, u can see the below screenshot, “Issue Status” is in Read mode and “Issue Assigned UserName” is hidden for the employee(Lakshminarayana k).
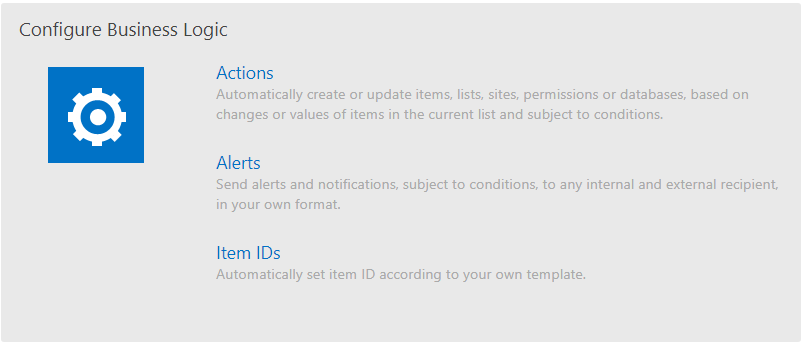
Configuration Bussiness Logic section
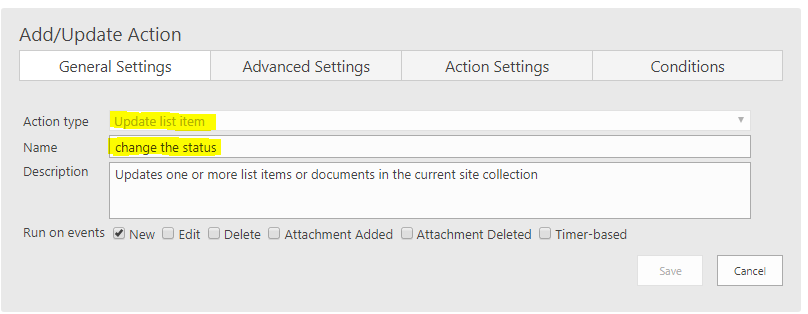
Now coming to configuration Bussiness logic section, go to an “Actions”.
infowise ultimate forms
In GeneralSettings, enter Action type, Name, and Description as shown below.
infowise sharepoint online
Next, In Action Settings, select Site and List. for other things follow the below screenshot and click on save button.
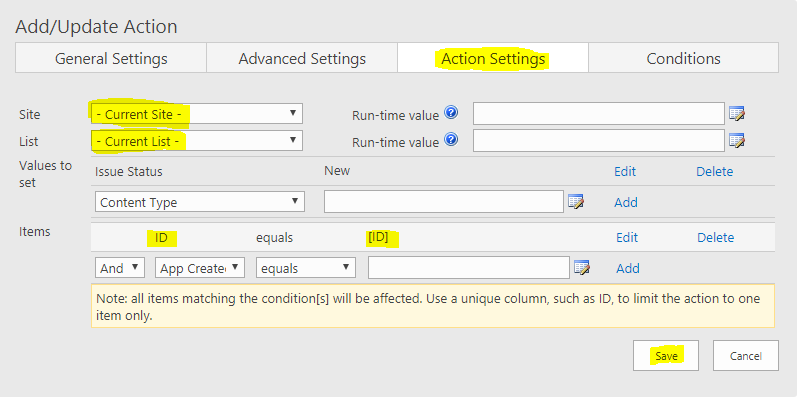
Infowise ultimate forms
Next, go to “Alerts“, In GeneralSettings, enter Title, select Site and list from the drop-down list.
In the Recipients section, click on the green plus button. select column “Manager ” from the dropdown list and click on Add button as shown below.
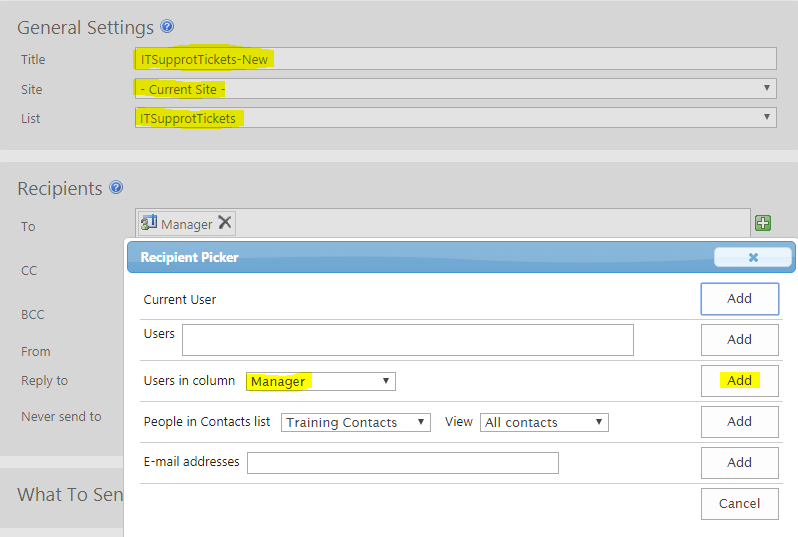
infowise ultimate forms
Next coming to ” What to send ” section, here go to Condition, select Issue Status is equal to New. When issue status is equal to new, the mail will go to the manager.
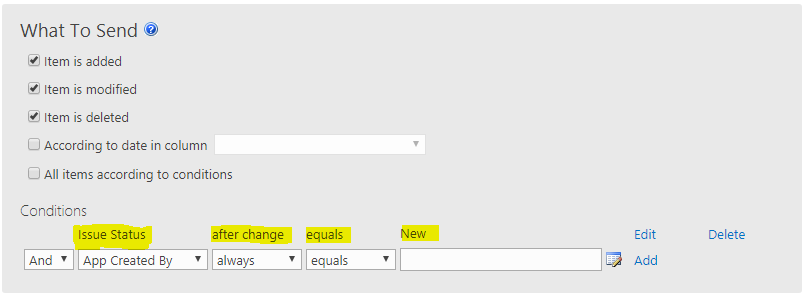
infowise sharepoint online
Next coming to “Mail Template“, click on “Add or update mail templates” as shown below.
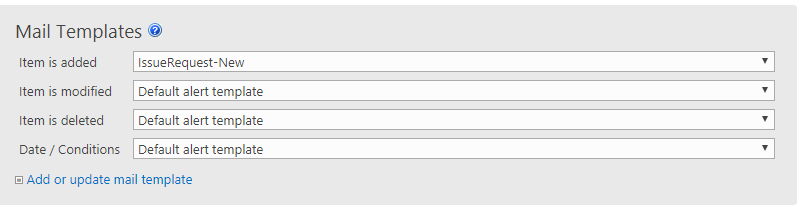
infowise ultimate forms
When Click on “Add or update mail template“, it will open a Template dialog box, here enter Name of the template, Subject, and Body as shown below.
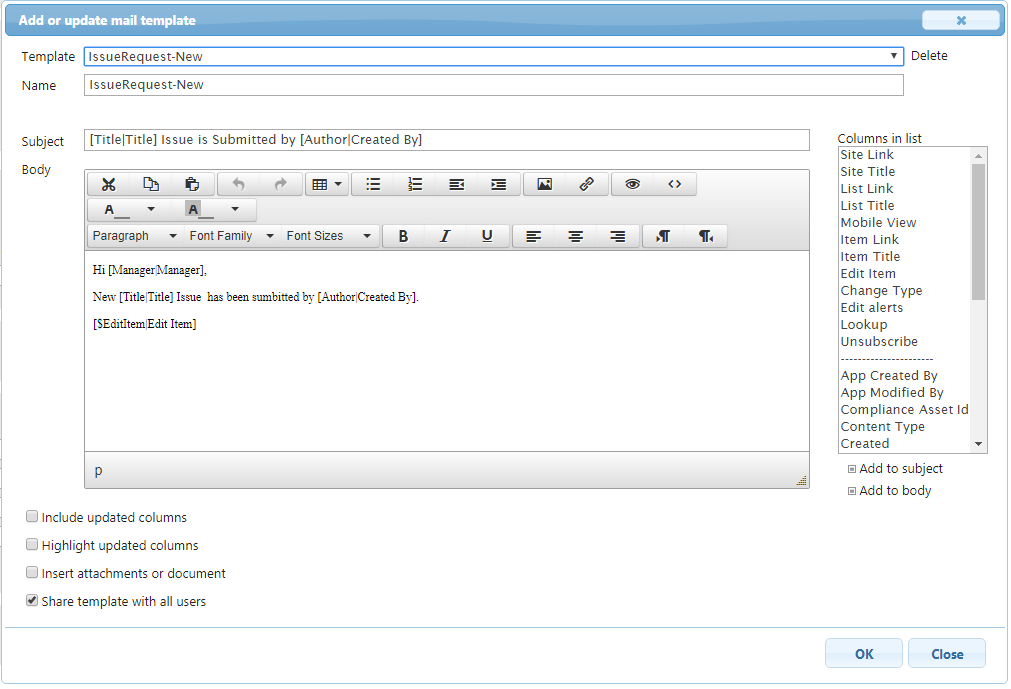
infowise ultimate forms
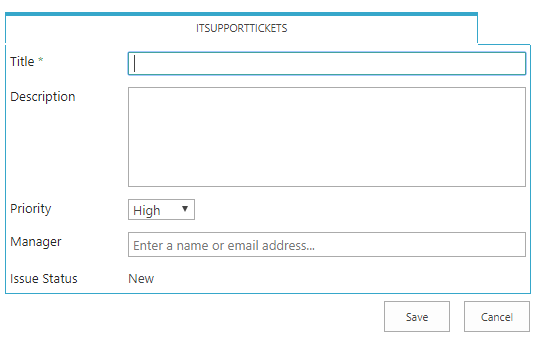
The employee goes to the list, then click on the new item it will show a design layout tab as shown below, here look at “Issue Status ” is in “Read ” mode for the employee and status is “New“. Now enter the details and click on save button.

infowise ultimate forms SharePoint online
Now the item added to the list as shown below. In this list, look at “Issue Assigned username”, it is empty. if you look at the above screenshot this column is not available for the employee. It is only available for manager and user1 (another user) in this example. infowise ultimate forms SharePoint online
Now the Manager will get mail about the new issue is requested by the employee as shown below.
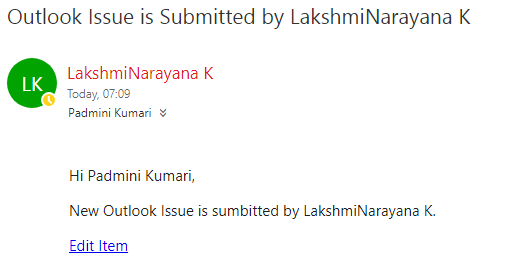
infowise ultimate forms SharePoint online
In our next article, we will discuss how the manager can assign the task to other users for the task to complete. If you have not tried yet, then download Infowise Ultimate Forms 30-day trial. Read Creating SharePoint HelpDesk Using Infowise Ultimate Forms Part-2.